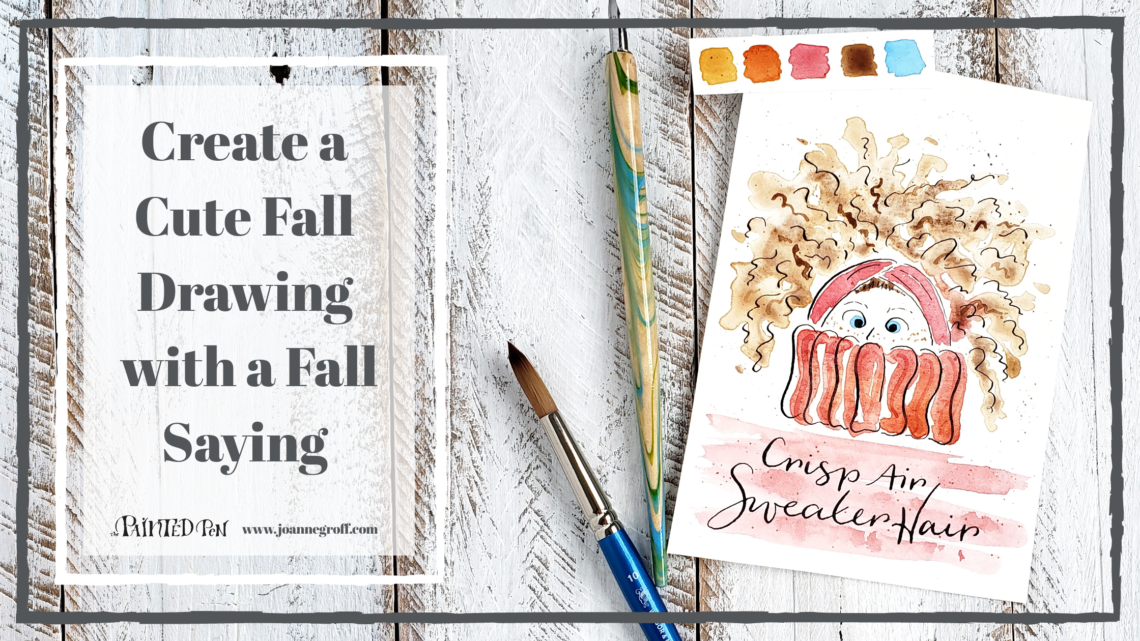
Create a Cute Fall Drawing with a Fall Saying
Learn how to create a cute fall drawing with a fall saying, all with a calligraphy pen. Then, add a touch color with a loose watercolor technique.
Here we are, on the brink of the great holiday season. Somehow, Halloween never quite feels a part of the thrill of Christmas for me, but Thanksgiving always does. I’m guessing that’s because we always picked out our Christmas tree the Saturday after Thanksgiving when I was a child. Some things just stick.
This week’s tutorial feels like a transition for me too, not quite fall, not quite wintery Christmas, but still a little bit of both. And we’ll mix in a little bit of my silly side. Go ahead, have a laugh at it. It’s me, I don’t mind.
Yep! As the weather turns crisp and I start wearing jackets or sweaters, so comes a bad case of static cling hair.
Along with this cute fall drawing, we have to have a funny fall saying. It’s a must, so we’ll add that in calligraphy as well.
Here’s the video to give you an overview. Then, we’ll jump into the details.
What you need:

- Basic calligraphy supplies with Sumi Ink
- Basic Watercolor supplies
- Winsor & Newton Cotman Sketcher’s Pocket Box, for fall colors
Let’s get started!
Cute Fall Drawing
You can draw a picture of yourself, of course. This always happens to me as the weather gets colder. Frizz static, static frizz. And as my hair is getting longer, I anticipate it being worse this season.
Here are some steps if you want to draw me. Otherwise, change the hair, eyes, skin, sweater colors to yours (or a dear friend’s just for fun).

Draw it in pencil first. Then, use your calligraphy pen to go over it in ink. I used Sumi ink (remember … it takes hours to dry completely before you can use watercolor on top of it. Learn more about ink drying when you read Ink and Watercolor, testing ink with water on a dragonfly drawing.).
As you see, I don’t stick to my pencil drawing 100%. But do try to vary your strokes, thick and thin, to add character and definition to your drawing.

Fall Saying
Choose a fall saying or use mine, “Crisp Air, Sweater Hair,” and write it in your favorite calligraphy style. Again, I start with a pencil to make sure it’s somewhat centered on the page.
Let the ink dry completely.

Watercolor, Layer 1
Use a larger brush and a loose wet on wet watercolor technique, starting with the hair. I usually start at the top of a painting so I don’t have to work around the wet areas as much.
Paint with water first or a watered down light brown color. I did a mixture of both.
Leave lots of white pockets. This will help it feel more like strands of hair. If you have straight hair, try to shape those pockets straighter. My hair is curly, so going every which way is normal. The pockets I painted reflect that.
While the paint is still wet, tap a darker brown (if your hair is brown) into some areas. My hair is darker underneath and lighter on top and at the ends from the sun.

Paint the hair in a loose watercolor style to make it look full of static. 
Tap in darker paint while it’s still wet.
Next, pick a color for the headband and sweater. I used red for the headband and a red-orange for the sweater. You can paint them loose or just fill in the space with color. On mine, I filled in the headband but not perfectly, and I painted the sweater in a loose style.

As always, you can tap in more color as long as it’s still wet.
Let it dry completely.
Watercolor, Layer 2
Now, use a smaller brush to add a few extra details … maybe a few painted strands of unruly hair, a dotting of freckles (in my case), some blue eyes, and some ribs on the sweater.

Paint individual hair strands on the loose watercolor background. 
Add a sprinkle of freckles.
To tie it all together, swipe across the lettering with paint that matches the sweater and added some red and brown splatter. For the splatter, fill your smaller brush with paint and tap it against your finger. It might make a mess, so be sure to cover the area around the painting if you need to.
Let it dry again … and you’re done!

I’d love to see the pictures you paint of yourselves with sweater hair (and if you painted one of me!). Instagram is a great place to share, just remember to tag me, @the.paintedpen so I can see it too.
Or you can simply respond to this email with your picture (if you don’t receive emails and would like to get the most recent posts and updates sent to your inbox, sign up for Blots & Jots emails).
Thanks for following along … and Happy Creating!


