How to Draw an Apple 6 Ways
Let’s celebrate the coming of fall by learning how to draw an apple six different ways using a calligraphy pen and a micron pen. We’ll add watercolor to make it pop, of course.
Fall is on the way. Here, the first sign of fall isn’t the colors, return to school, or the pumpkins. It happens before that, and it’s even sweeter.
Apples!
We live just down the road from an orchard and tend a few apple and pear trees of our own. Starting in the middle of August, those fall fruits start getting pink cheeks. The first variety doesn’t turn completely red, so we have to keep checking for ripeness. Our MacIntosh apples are ripe now, but we have to wait for our Fuji and Empire apples.
To celebrate the beginning of fall and all of the comforting apple deliciousness on the way, we’ll draw an apple … not once, but six different ways. Are you ready?
Gather your supplies.

- Basic calligraphy supplies with Ziller ink
- Basic Watercolor supplies
- Winsor & Newton Cotman Sketcher’s Pocket Box
- Micron pen
Draw an Apple 5 Different Ways (and one more at the end)
Read on for more tips or jump to the tutorial.
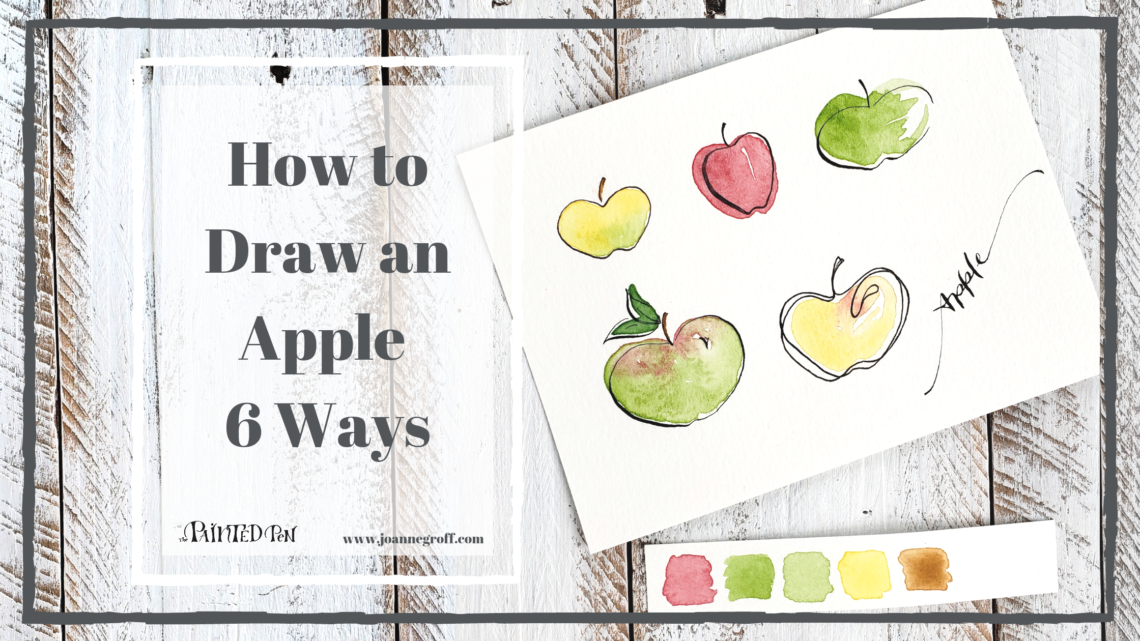
Apple #1 Simple – Use a micron pen to draw a very simple, classic apple with a stem.
Apple #2 Tall – Some apples are taller and thinner than other apples. Use a calligraphy pen to draw a Red Delicious apple.


Apple #3 Plump – Draw a plump and crunchy apple with a calligraphy pen. Draw one thick side and one side that is light and open.
Apple #4 Cute – A cute apple is a lot like a classic apple with a couple of leaves and a highlight square on the right side. Use your calligraphy pen for this one.


Apple #5 Continuous Line – Draw a continuous line apple without lifting your micron pen as you trace the apple twice.
The drawings don’t seem complete without a little apple calligraphy. Draw it in your favorite calligraphy style with your calligraphy pen, of course.


Add Watercolor in Apple Colors
Now, it’s time to add a layer of watercolor to make these drawings pop. Think about your favorite apple colors. One of my favorite apples is green with red shoulders. Green and red are both good apple colors. Another delicious apple is yellow. You know the one, Yellow Delicious.
Let’s start with yellow on the simple apple. Paint yellow inside the lines for this one. We’ll paint outside the lines on the next few. With the paint still wet, tap a little green into the bottom corner. Add a brown stem, and the first one’s done.
Now, the tall apple needs to be red like Red Delicious apples. Don’t worry about staying inside the lines. Sometimes, when you paint outside the lines, it makes your drawing more interesting.
For the plump apple, use green and change the shape of the highlight. Use your brush to paint brushstrokes across it.


The cute apple needs to be red and green, but that means we have a problem. Red and green are complementary colors. That means, if you blend them too much, they turn brown. No one likes a brown apple. Unless you’re a fruit fly, that is.

Be careful.
But if you’re really careful, you can paint red and green side by side without creating brown.
Start by painting the cute apple drawing with plain water only. Then, tap a little bit of red on the shoulders. Tap green into the bottom of the apple. Don’t work it around the red too much, but you can tap extra green in the bottom while it’s still wet if you need more color. Just stay away from the red.
Finish this one by painting the leaves a darker green and the stem brown.
And finally, paint the continuous line apple yellow. Drop a kiss of pink on the top right corner while it’s still wet.


Ready to draw an apple one more time?
In a pie. Now, that’s a great apple.
Start by drawing a pie with a calligraphy pen. Don’t forget the steam and “in a pie” written in calligraphy.
When the ink dries, paint the crust brown. Take a spray bottle of water, and mist the crust until the brown spreads across the page. Let the background layer dry completely.


Mist water on the paint to create a watercolor background.
On the next layer of watercolor. Paint a more defined pie crust inside the lines.
And paint the pie pan. Let’s match the green and red of the cute apple. Brush green from the left to the middle of the pan. Then, brush red from the right to the middle, just lightly touching the green.
Let it dry again.
Finally, add a curly crust edge and one final layer of brown to the top of the crust for depth.


And you’re finished! You just made six different apple drawings. Time for a piece of pie?
Watch How to Draw an Apple 6 Ways
And always remember … enjoy the process.

Joanne Groff
Just a brainy creative with a fascination about how people think and understand. I use watercolor and letter design to encourage connection ... with self, the environment, and especially the people who live there.

