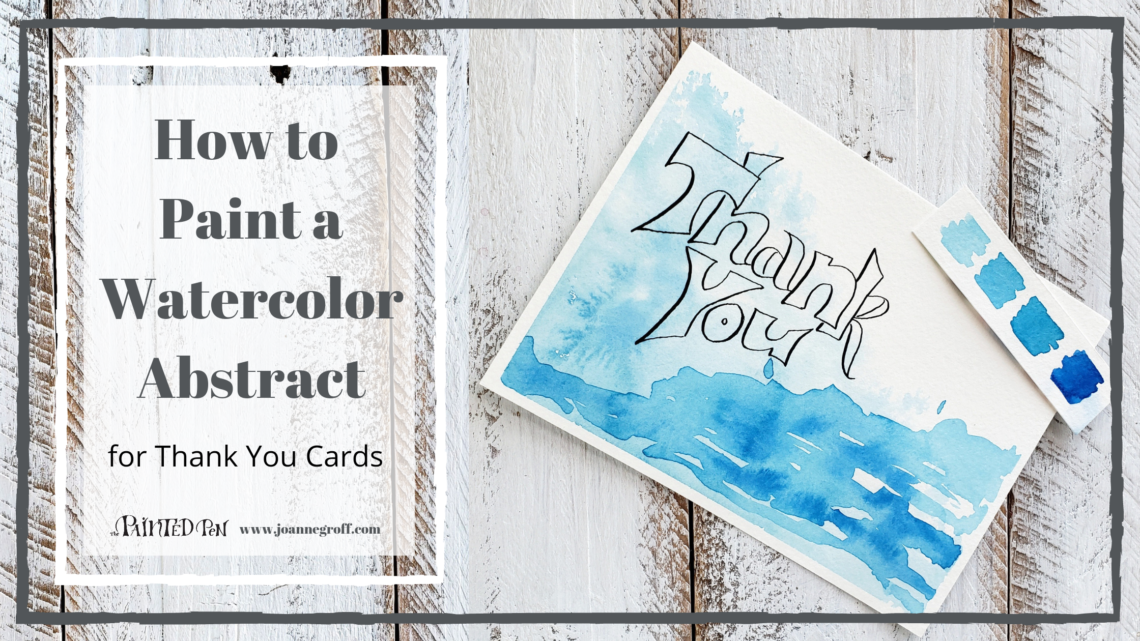
How to Paint a Watercolor Abstract for Thank You Cards
Turn a watercolor abstract painting into a Thank you card by adding some lettering. Learn how to paint it and letter it.
After a big holiday season like Christmas and New Year’s, this stationer starts thinking of Thank you cards. Just think of all of those gifts exchanged.
I’m always grateful for the gifts, and I can usually say “Thank you” in person. But occasionally, I get an unexpected gift that warrants something extra. Or I just need to send a note of appreciation for all of those people who work so hard to help my kids grow up.
I have numerous designs to pick from, but some of the designs feel a little feminine to send to the coach of a boys’ soccer team. The coaches I can think of wouldn’t really be impressed with a bouquet of calligraphy roses.
Those are the times that I like to use an abstract watercolor background with lettering. It’s a fantastic way to add a bit of color to a Thank you while still keeping it simple and much more appealing to these coaches.
This tutorial will give you an idea of how to use an abstract watercolor painting to make a Thank you card.
Gather your Supplies

- Basic calligraphy supplies with Ziller Soot Black Ink
- Basic Watercolor supplies and your favorite blue (here’s one of mine)
- Winsor & Newton Cotman Sketcher’s Pocket Box
Let’s get started or you can Jump to the video.
This project will take a lot of water. It’s a good idea to tape your watercolor paper to a hard surface with masking tape before you start.
Now, it’s time to choose your color palette. I like to paint different colors to see how they look together before I choose which ones to paint.
You can mix colors from your head or look for color palette ideas on Pinterest. There are some lovely ideas there if you can keep yourself from being distracted by the sheer number of options.

Watercolor Background, Layer 1
Time to paint! I decided to work with a monochrome blue color scheme and a wet on wet watercolor technique (Learn about more watercolor techniques).
For the first layer, mist clean water onto your paper. If you don’t have a spray bottle, you can paint the water instead. The edges look a little different when you use a spray bottle.
Tap a light blue into the water and spread it throughout with your brush. A large brush works best for this, but a smaller brush will work too (notice that I used a smaller brush this time).

Hint: You don’t have to spread the paint perfectly inside the water. It will continue spreading on its own as it dries, and I think a mixture of lighter and darker areas only add to the appeal of the abstract background.
Let it dry completely.

Layer 2
Look closely at the first layer. Take time to notice the areas that you like. You’ll want to keep your second layer away from those areas.
I loved this bloom in the bottom corner. It’s a keeper.

Next, use a slightly darker blue to paint a second layer on your background being careful to stay clear of those special areas. This is an abstract painting, so there are no rules with the shape of this layer. Play and have fun exploring the options.
I like to leave areas where the first layer can peek through.
While it’s still wet, tap in an even darker blue into a few areas. It will naturally blend and add some more depth as it dries.

Let the first layer show through in some areas. 
Use the wet on wet watercolor technique to tap a darker blue onto the watercolor abstract.
Let it dry completely.

Thank you Lettering
Take a moment to look at the space you have left and think about how you want your Thank you lettering to look and where it might look nice.
I’ll keep mine over the lighter blue area to make it easier to read. Maybe an outlined lettering style will look nice to allow the watercolor abstract to show through.
For me, it’s helpful to sketch my lettering style in pencil before I trace over it with a calligraphy pen. I tried to keep thick strokes on the left sides of the letters to give it a hint of shadow.
Don’t worry too much if you have a wiggly area in ink. Just carefully go over it again, and it will usually straighten itself out.
And you’re done!

Finished! 
There’s that bloom again!
Watercolor Abstract on a Thank you Card Video
Maybe you’d like to try a couple more abstracts in different colors for your Thank you cards.

If you need ideas for Thank you lettering, try the Thank you Lettering Idea Worksheet Set. It has over 50 Thank you lettering and calligraphy ideas. The page below is free to download in the Resource Library for all Blots & Jots email subscribers.

Enjoy! And remember to take some time to play creatively … it’s amazing for a mental refresh.

Joanne Groff
Just a brainy creative with a fascination about how people think and understand. I use watercolor and letter design to encourage connection ... with self, the environment, and especially the people who live there.

