How to Use your Apple Drawings for a Card
Let’s take one of those apple drawings from How to Draw an Apple 6 Ways and turn it into a fall card.
The fall flavors continue … and will continue (for me, at least) as the weather gets chillier, the leaves begin to change, and all things cozy become normal again.
I love summer and warm weather, and I want it to last forever. There is a part of me that gets sad as the days shorten into winter. But another cozy part of me loves fall just as much with its crisp temperatures and comforting flavors. I just can’t dwell too much on winter coming. Winter can get very long.
As I think about fall coziness, I’m also combing my brain for new fall designs. Some will be cards this year, and some might have to wait until next fall. We’ll see how fast they work out. But this tutorial came from just such a search and will produce a new addition to my fall cards. Here you’ll get to see just how I did it.
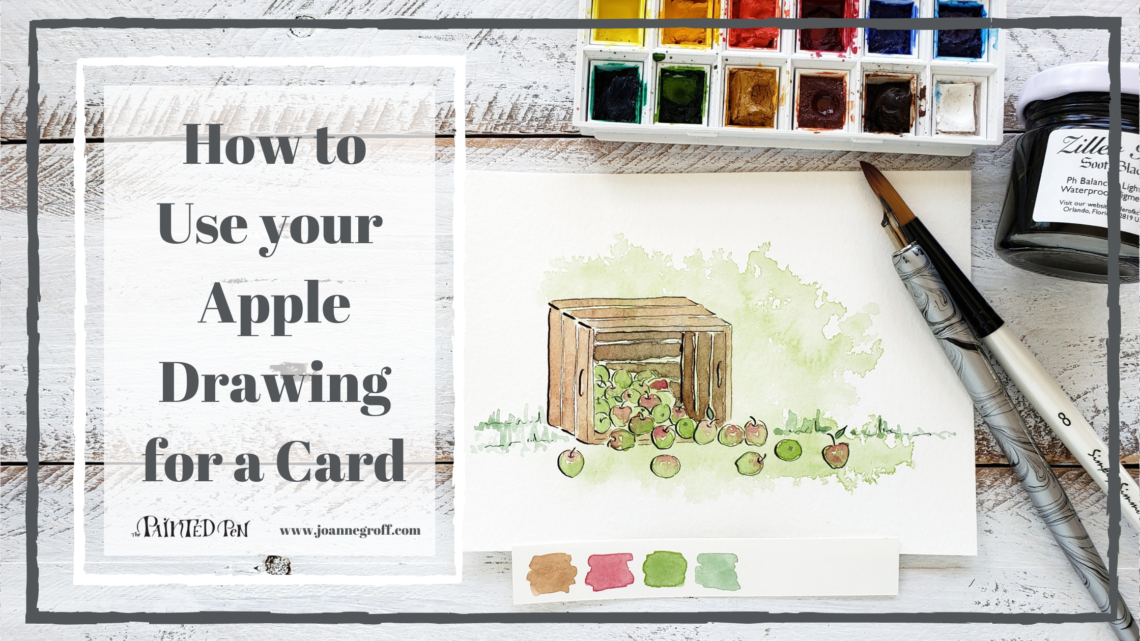
Gather your supplies.

- Basic calligraphy supplies with Ziller ink
- Basic Watercolor supplies
- Winsor & Newton Cotman Sketcher’s Pocket Box
Read on for more tips or jump to the tutorial.
Apple Drawings in Ink
Use inspiration from the recent apple drawing tutorial, How to Draw Apples 6 Ways. Choose your favorite apples and colors to use with this tutorial. I’m using the cute apple and colors to create a pile of apples, so we’ll see the apples from all different directions: front, side, and bottom.
Here are some ideas to get you started as you draw your apples inside an apple crate. Somehow my crate got knocked over, spilling apples all around it. I plan to turn it into a “Thinking of you …” card (you know, when things aren’t going your way), but it will work just as well for a “Hello fall” card.
When you have your sketch the way you want it, go over the pencil lines with ink.


Watercolor Background
After the ink dries and you’ve erased the pencil lines, it’s time to add the watercolor background. Use some of the apple color to paint loosely over the apples. Then, mist the watercolor with water to spread it farther over the page.
I used my brush to help spread the paint around in the water.
Let it dry completely.

Wet 
and dry!
Another Layer of Watercolor
Now, this drawing will come to life. It’s time to add another layer of watercolor and some more color.
Start with the crate. Brown, of course, but use a darker brown (maybe with a little black mixed in) for the inside of the crate. This will create a shadow.
Then, use a lighter brown to paint the outside of the crate.

Next, we’ll paint the apples. Use your favorite color apple. One of my favorite apples is Cortland. Since they are green and red, I’ll paint my apples those colors.
Green first. Paint some apples all green and some apples partially green, leaving room for the red tops.
While it’s still wet, paint some apples with red cheeks. It’s okay if it touches the green paint, but don’t mix it around too much. If you do, red and green will mix to brown. I don’t really like brown apples, do you?


Add a darker green for the grass and the apple leaves.
Finally, if you need to, paint a second layer of shadow on the inside of the crate. I needed to.
Add some Calligraphy to the Card
To finish the card, a little bit of calligraphy might be nice. Practice different sayings in calligraphy to see which one you think looks the best. I practiced, “Thinking of you …” and “Hello fall!” I liked them both, so I might make one of each card.


And you’re finished! I hope this helps your whole house feel like fall. The only thing better? Getting to taste some apply goodness.
Watch How to Use your Apple Drawings for a Card
Enjoy the process!

Joanne Groff
Just a brainy creative with a fascination about how people think and understand. I use watercolor and letter design to encourage connection ... with self, the environment, and especially the people who live there.

