Maple Leaf Drawing
This post contains affiliate links to products and sites that I recommend and use. I may receive a commission (at no additional cost to you) if you use these links to make a purchase. These links help me cover the cost of creating the content I offer on this site.
This time of year inspires me to create all things fall, maple leaf drawings, oak leaves, birch, ginkgo, sumac. Their shapes and colors enthrall me, and I find myself stopping to pick them up (or to jump on the really crunchy ones) on my runs and as I walk to the mailbox. One of my favorite trees is a maple tree in town. Its colors range from red (almost pink actually) through orange, yellow and green … all at the same time. Sometimes on the same leaf. Amazing.
As the world around me is painted, I’m inspired to paint and draw as well. So I came up with a quick and easy maple leaf drawing tutorial for you to try. We’ll add a touch of watercolor to brighten the leaf too.
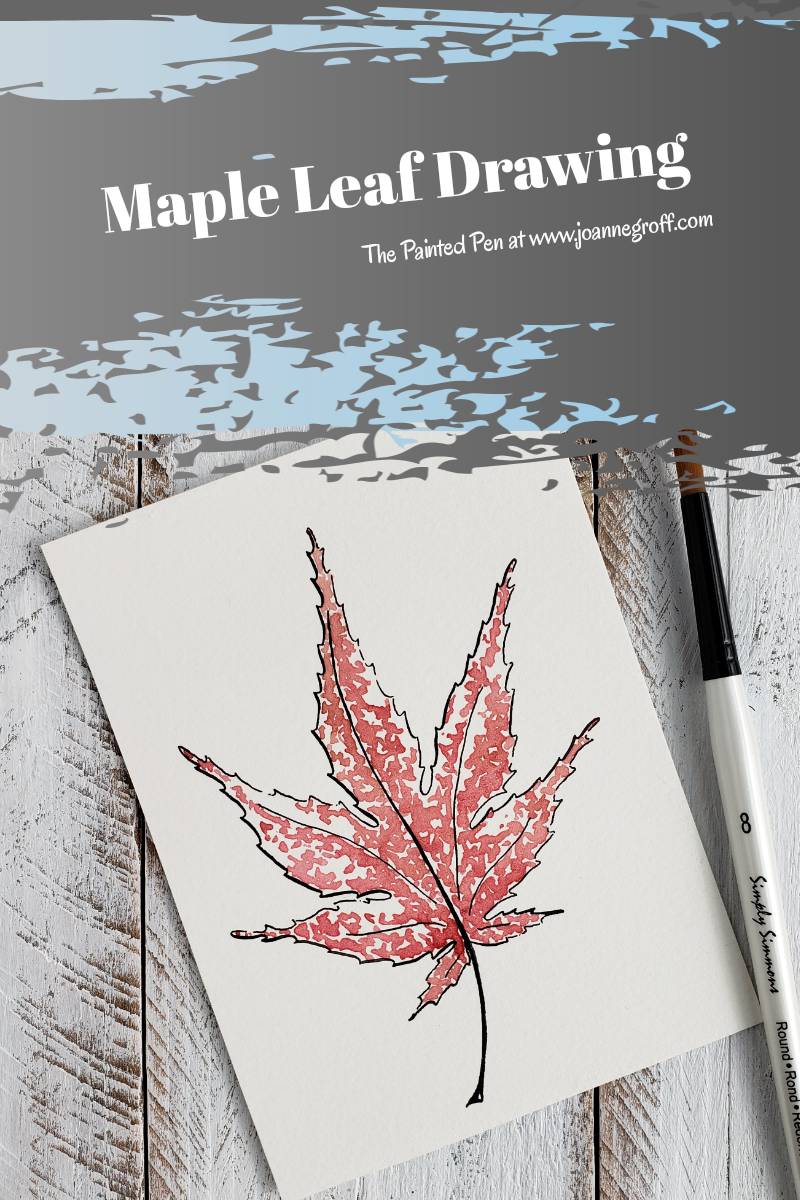
Even among maple leaves, shapes vary. They are fat, pointy, large, small, or even segmented. I chose a Japanese maple leaf to draw for this tutorial. It’s not from my favorite tree, but I love the pointy, segmented look anyway.
What you need:
- Watercolor paper
- Round brush
- Watercolor paint (red)
- Calligraphy pen, nib and ink (or micron pen)
- Light box, optional
- Clean water
- Paper towel
- Masking tape
On to the project!
Find some leaf inspiration. I usually hunt for leaves in outside or use reference photos taken from several different angles to get a feel for the shape of a real leaf.

Draw a few different leaves to decide which leaf you’ll use for the tutorial. It doesn’t have to be a maple leaf.

After you choose the leaf you want to draw, sketch it onto the watercolor paper. I chose a Japanese maple, so I will finish the project with that leaf.
I like to use a light box to transfer the leaf onto my watercolor paper, especially when I want to experiment with multiple techniques or tools. You don’t have to use a light box. It just saves time.

Use a light box to save time when doing multiple sketches of the same leaf. 
Sketch the leaf onto watercolor paper with a micron pen or pencil to trace over with a calligraphy pen.
Here I drew one leaf with a micron pen and one leaf in pencil. Then, I traced over the pencil with a calligraphy pen. Remember to erase your pencil lines when the ink is dry if you use a pencil first.
Side by side you can compare the differences of the thick and thin lines of the calligraphy pen next to the thin lines of the micron pen. I often need to see things to decide what I want to do next.

From here, I’ll continue with the calligraphy leaf drawing.
Now, it’s time to add lazy stippling to bring a little color to your maple leaf drawing.
First, tape the edges of your watercolor paper to a waterproof surface or art board. Watercolor paper tends to warp, especially with techniques that require a lot of water. Securing the edges helps your art dry flatter. You will leave the tape on until it’s completely dry.
For this leaf, I wanted to use a watercolor technique that I call lazy stippling. Stippling is a dot technique that uses a series of dots to add shape or shadow to a drawing or to add color. Lazy stippling uses the same idea, but instead of lifting your brush to make dots, lightly drag your brush. The effect looks like lazily connected dots. Fill in your leaf with lazy stippling. Remember to leave white space to add texture to the finished leaf. (To learn more about lazy stippling and how to use it, read How to Use Stippling for Watercolor Texture.)

Fill in the leaf with the lazy stippling watercolor technique, leaving white space to add to the effect. 
Finished! Now wait for it to dry.
Carefully remove the masking tape so as not to tear the edges of the paper.
Viola! A maple leaf drawing for you to hang in your office and brighten up your work space.
Don’t forget to share your leaves on Instagram. Tag me @the.paintedpen so I can see them too!
Happy creating!

For another fall tutorial, check out Pumpkin Drawing with a Flourish.
And if you’re still in the mood for spring, try this Tulip Drawing, using a different watercolor technique
Joanne Groff
Just a brainy creative with a fascination about how people think and understand. I use watercolor and letter design to encourage connection ... with self, the environment, and especially the people who live there.

