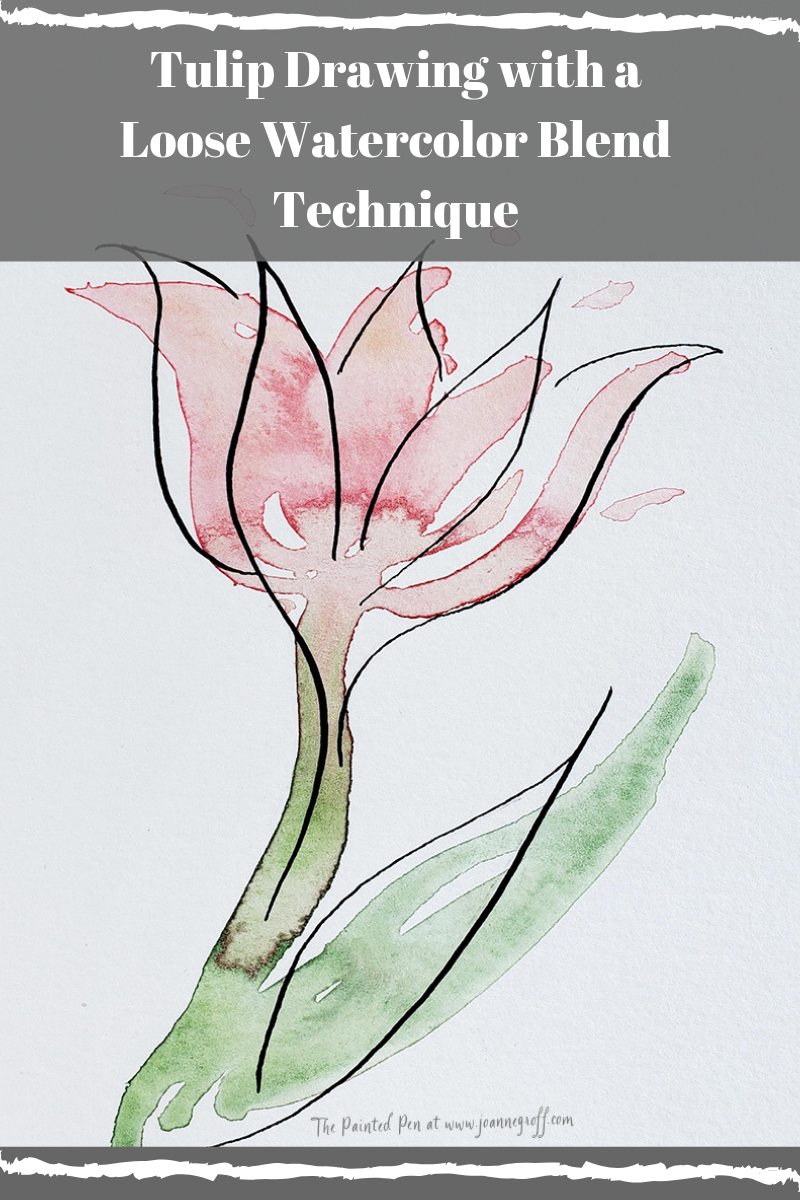
Tulip Drawing with a Loose Watercolor Blend Technique
Tulip drawing. Who can resist tulips? Or flowers in general?
This post contains affiliate links to products and sites that I recommend and use. I may receive a commission (at no additional cost to you) if you use these links to make a purchase. These links help me cover the cost of creating the content I offer on this site.
When the weather turns warm, I open the windows, cut and display whatever flowers bloom and let the outside in. When I stop to paint, the same thing happens, the outside comes inside in the form of flowers. I gravitate to painting them just like the weather gravitates to warmth.
Today, I want to share with you another way to use one of those Watercolor Techniques we learned about several posts ago. I called it the multi-colored splot technique. It’s very wet, allows for blooming (some people avoid blooming with watercolors, but I love it), and it can add a lovely looseness to your painting if given a little direction. Of course, I’m combining it with a little dip pen tulip drawing. Really, you can use any pen, but I like the effect created by contrasting thick and thin ink strokes.
Let’s get started.
What you need:
- Water
- Paper towels
- Paint brush (A medium, size 8-12, round brush will work well for this project)
- Watercolor paper (I use Canson Watercolor paper for practice. It needs to be taped to an art board. Strathmore Watercolor paper 300 series can handle more water without tape, but this is a very wet technique. I would still tend to tape it just in case.)
- Watercolor paint – Red, Pink, Orange and Green (I like to use Winsor and Newton Cotman paints for practice and their professional series for projects I intend to sell)
- Dip pen with Nikko G nib
- Black ink (Sumi drawing ink or Ziller Ink work well)
Steps:
First, dip your brush in plain water, and use it to paint a loose tulip shape on your watercolor paper.

Next, mix a little bit of pink paint with a little bit of orange paint until you have a coral color. You may need to test this on a separate piece of paper to check your color. Then, take a little color with the tip of your brush and add it to the water tulip petals. If you load your brush, you will end up with too much color. For this project, a translucent color will work best.

Add a touch of red paint to the tips to darken them.

Take up a little green paint on the tip of your brush and touch it to the stem and leaf of the water tulip.

As you can see, the color moves quickly down the stem and can become muddy where the colors mix. If you see this happening, take a paper towel and dab it lightly to the spot where they meet. It will pick up enough of the color to prevent too much blending. It’s okay if they mix a little, it adds to the loose look, but we don’t want the whole stem to turn brown as the pink and green mix.

When it’s dry, add a loose tulip drawing on top of the watercolor, but try not to line up the edges of the ink with the edges of the watercolor.

C’est Fini!
Stand back and enjoy your work! Try it again, and choose your own colors to blend. What else can you use this watercolor blend technique to paint?
I’d love to see your results. Please share them on Instagram and tag me @the.paintedpen so I know where to find them!
I hope this tutorial brightened your day!
Happy creating!

Joanne Groff
Just a brainy creative with a fascination about how people think and understand. I use watercolor and letter design to encourage connection ... with self, the environment, and especially the people who live there.

