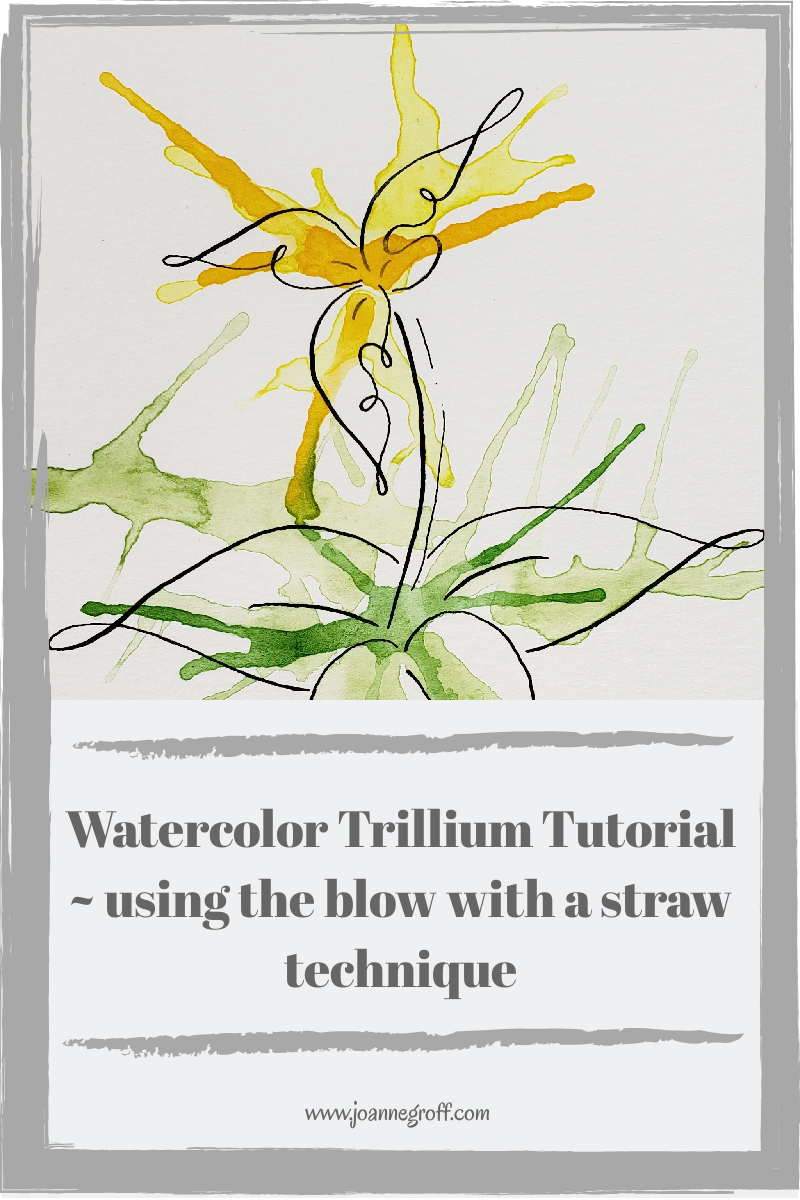
Watercolor Trillium Tutorial – Blow Painting with a Straw
Calligraphy Watercolor Trillium Tutorial using the blow painting with a straw watercolor technique. To learn about some more watercolor techniques, check out this post, Watercolor Techniques.
This post contains affiliate links to products and sites that I recommend and use. I may receive a commission (at no additional cost to you) if you use these links to make a purchase. These links help me cover the cost of creating the content I offer on this site.
One of the first flowers I think of in spring is the Trillium. I enjoy looking for their unique sets of three leaves during hikes in the woods near our home. I keep an eye out for other three-leaved plants, too (poison ivy), but with less thrill when sighted.

Trillium bloom in white, yellow or burgundy, but it’s rare that I actually get to see one blooming.
Today, I’ll show you one of the watercolor techniques that we talked about last week, on a calligraphy drawn trillium. You could use any of the techniques for this project, but I decided to try the blow painting with a straw watercolor technique.

What you need:
- Watercolor paper of choice (I use Canson Watercolor Paper to play)
- Watercolor paint (I like Winsor and Newton Cotman tubes or pans when I play)
- Paint brush, any medium round brush (I used a Simply Simons Round, size 8)
- Pipette
- Straw
- Water
- Paper towel
- Trillium printout from the resource section (picture below) … or
- Dip pen holder with nib and sumi ink (to draw the trillium)
And now … on to the blow painting tutorial!
- Draw or print your trillium on watercolor paper, and tape the watercolor paper to an art board or flat surface. This will help the painting to dry flat.

- Use the pipette or brush to place a drop of water onto a petal, near the middle of the flower.
- Then, fill your brush with yellow (or color of your choice), and add the color to the water droplet.

- Point your straw at the droplet, and angle it in the direction you want the paint to splatter. Blow. If you blow quick;y and hard, it will spread differently than if you blow slowly and easily.
Note: The blow painting technique can only be controlled so much. Enjoy the unpredictability.

- Repeat for the other two petals.
- Next, add water droplets in several places on the leaves. I kept mine near the middle because I wanted the splatter to go out.
- Fill your brush with green paint, and add it to the droplets.

Drop water in several places around the leaves of the trillium. 
Add green paint to the drops.
- Point your straw and blow. Feel free to turn your paper and blow on the paint from different directions.

- Let the paint dry.
- Leave it as it is or add another layer of color. My yellow trillium looked too light after the first layer, so I added a darker layer on top.
- Print it again and try another color.

I hope you enjoyed using this watercolor technique as much as I did. Share your thoughts in the comments below. I’d love to hear about your creating process.
Play often …
and Happy Creating!


