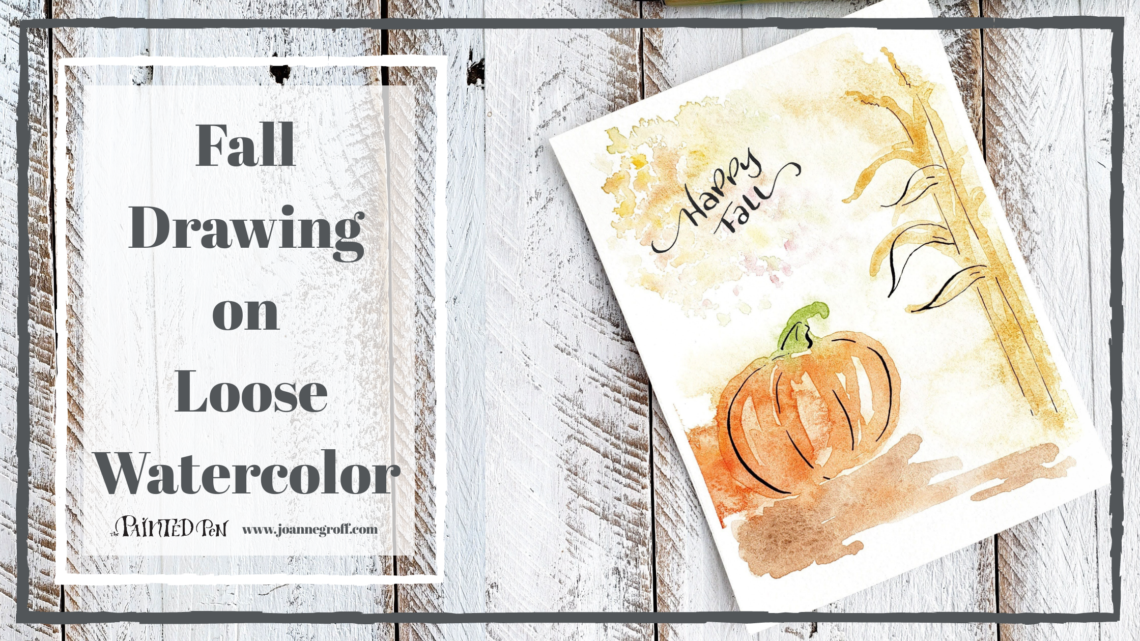
Fall Drawing on Loose Watercolor
We’ll learn how to create a fall drawing on loose watercolor featuring a pumpkin in a cornfield. Use it as a backdrop for fall quotes or as the beginning of exploring more fall pumpkin drawings.
It seems as though I have pumpkins on the brain this fall. I mean, I can hardly help myself. The ideas just keep coming. I blame it on the long and brilliantly colored fall we are having. The beauty is truly awe-inspiring.
Yes! Too many fall ideas for tutorials and not enough fall to give them to you. So, we’ll go with another pumpkin drawing and give you one or two more fall ideas before we head into the Christmas season. (I’ve already started some Christmas ideas. Shhh … don’t tell anyone. And yes, I’m one of those people. It’s not skipping fall … it’s one big season of celebration … Thanksmas/Christgiving.)
A week or so ago, I discovered an artist who has a beautifully loose watercolor style. Her name is Camilla Damsbo. She has a free tutorial showing how she does it along with other courses on her website (I don’t get anything for saying this … I just think her work is marvelous!). Definitely check her out when you have time. Her spray bottle method for adding water inspired this tutorial.
Now, on with the fall drawing tutorial!
Here’s the video so you can get a feel for the project. Then read on to learn more.
Gather your supplies

- Basic calligraphy supplies with Ziller Soot Black Ink
- Basic Watercolor supplies
- Winsor & Newton Cotman Sketcher’s Pocket Box, for fall colors
- Spray bottle with water
Loose Watercolor Pumpkin
Normally, my watercolor backgrounds come together in one layer. I like the looseness and the simplicity all wrapped into one easy layer. I paint the pumpkin shape, leaving some white areas to make it interesting and let the colors blend a little like the pictures below.

Paint a pumpkin shape, leaving some white areas. 
Add a stem. It’s okay if the colors mix a little.
And it would dry like this.

But today, I want to show you how to create a loose watercolor background for our fall drawing using two layers. The extra layer adds a little bit of depth to the painting and an even looser feel.
Loose Watercolor, Layer #1
Tape the paper to a hard surface.
Spray the bottom left corner with some water.
Use various shades of orange paint (ranging from yellow-orange for lighter areas to red or brown-orange for darker areas) to paint a pumpkin-like shape. It will not hold the shape like it would if you used a brush to paper wet on wet watercolor technique. But you just want a vague pumpkin shape to create a loose background.
Don’t forget to add a little green for the stem.

Paint a vague pumpkin shape in the misted water. 
Don’t forget to add a stem. Notice how the water moves the paint.
You can let it dry or keep working on the background. I let mine dry, but you don’t have to.
Spray the right side of the paper. Use yellow ochre to create corn stalks. They will blend together and spread out. This is normal. It might feel a little out of control, but that is just the effect we want for this first layer.
Finally, spray lightly just above the pumpkin. Tap fall colors randomly into this spray, until you have a speckled, falling leaf feel.

Let it dry completely.

Loose Watercolor, Layer #2
For the second layer, we’ll use a little less water and a little more paint.
Paint a pumpkin shape similar to the first single layer pumpkin above. Leave some “white” areas to create highlights. They won’t be white this time because the first layer of watercolor will show through. Don’t forget that stem. It’s fine if it blends with the orange a little.

Paint the corn stalks the same way. Use more yellow ochre to paint stems and floppy leaves.
Then, paint a shadowed area under the pumpkin. Tap a hint of orange into the brown to draw the colors together.

Paint the second layer of the loose watercolor corn stalks. 
Add a shadow below the pumpkin.
Let it dry completely.

Fall Drawings
Now, let’s add one more layer, a drawing layer! It’s hard to resist a few fall drawings with my calligraphy pen.
Let’s add a hint of calligraphy on the pumpkin and a couple of corn stalks. I love the way calligraphy and watercolor mingle with loose and crisp edges.
Feel free to sketch the drawings in pencil first. Then, use Ziller ink to trace over the sketches, varying thick and thin strokes.

Add fall drawings with a calligraphy pen. A pumpkin … 
and corn stalks.
Add Fall Calligraphy
If you like it the way it is, leave it alone, but if you want a little bit of calligraphy, add “Happy Fall” or your favorite fall saying to the leaf area.

Add a calligraphy message. 
And you’re finished! Now you have a fall drawing with loose watercolor to keep or give away.
Happy creating!

You might also like this Acorn Drawings tutorial.
And remember … you can have these tutorials delivered to your inbox every other week when you sign up for Blots & Jots updates.

