How to Use Stippling for Watercolor Texture – all about lazy stippling
What exactly is lazy stippling? In this article, we’ll talk all about using a stippling technique, lazy stippling, for watercolor texture.
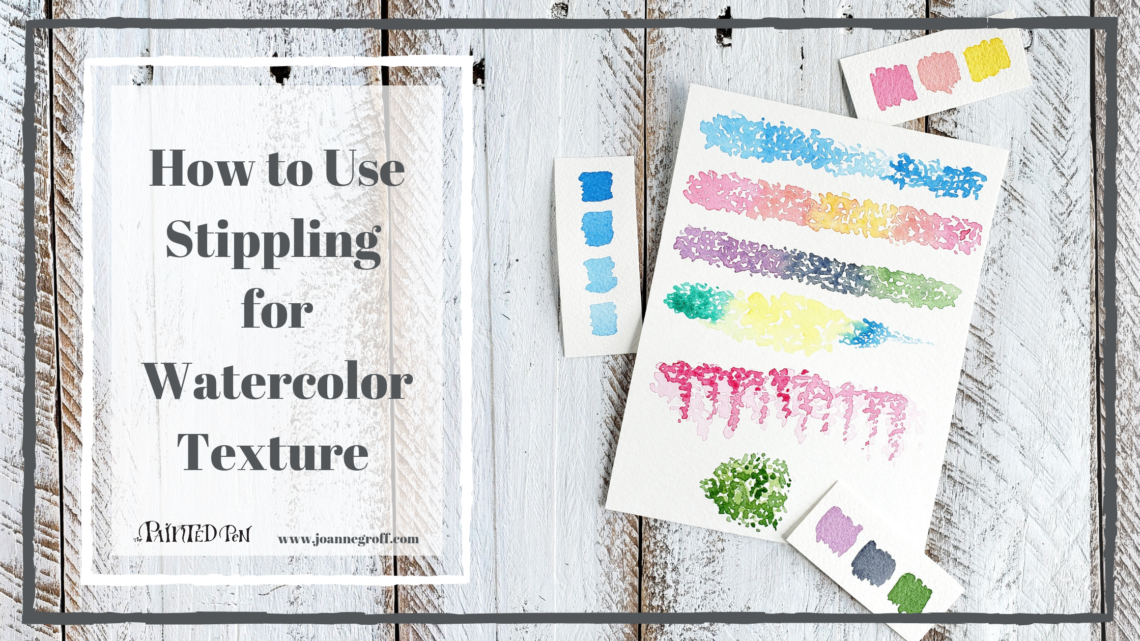
What is Lazy Stippling?
Let’s start with stippling, in case you’re unfamiliar with the word. Basically, stippling is creating art with dots, lots and lots of dots. The more compact they are, the darker the area appears, but as you spread the dots farther apart, the area appears much lighter. It’s a very interesting technique for drawing or watercolor.
But it’s also a technique that takes patience. Maybe more patience than I have or want to have.
So, when I feel the desire to create a stippling effect as I’m painting or drawing, I usually use a technique I like to call lazy stippling. Because … well, I feel like I’m really just being lazy when I use it. Rather than taking the extra time to lift my brush, pen, or pencil between each dot, I just kind of drag it along lifting only half of the time. And honestly, I’ve come to really like the results.

Why don’t we look at some ways to explore lazy stippling that involve color, size, shape, and layers to get started? Then, we’ll look at a few ways to use it beyond play.
Ready to give it a try? (or you can skip right to the video)
Monochrome Lazy Stippling
Choose one color to use until you get the basic concept.
I like to use a fair amount of water for this technique, especially if I’m blending colors. We’ll get to that part soon. But for now, we’ll create lazy stippling with just one color. Even that color can vary as you use more or less paint and water.
Fill your brush with paint and a fair amount of water. Touch your brush to the page, and start to move it around. Lift it and drag it creating squiggles across the page. Leave pockets of white areas as you work. Some of the squiggles will naturally look fatter or thinner than others. It all adds to the effect. That mixture of white and paint add texture and depth to a piece of art.
When you start running out of paint or water, refill your brush. You can fill it with just paint to make a darker color, just water to make a lighter color, or both to keep it evenly colored.

Blending colors
Blending colors can be a bit trickier, but it can also be quite fun if you keep a few things in mind.
Some colors blend better than others. Think about the color wheel. Colors that are next to each other (analogous colors) blend better than colors across from each other (complementary colors).

Now remember, it’s all about what you like and don’t like, so “better” is subjective. But if you want vibrant, distinct colors, use analogous colors like the ones on the right in the picture below. If you want gray or brown between the colors, go ahead and use complementary colors like the ones on the left in the picture.

When I want to blend complementary colors, I use a neutral color between them, like gray or brown (see the picture below).
To blend colors with the lazy stippling watercolor technique, start with one color.
Follow the same movements as above to paint a section of that color. While the color is still wet, rinse your brush and fill it with a second color. Leave a small area of white between the colors. Tap, drag, and squiggle with the second color. While you do this, gently touch the first color in spots to allow the two colors to blend.
Feel free to add one more color or many more colors in the same way.


Experiment with sizes and shapes
To change the size of your stippling, try different sized paint brushes. Larger brushes make it easier to cover larger areas quickly. Smaller brushes add more detail. See the difference below.


Try different shapes as you experiment with watercolor texture, like a rectangle, an outline, or any other shape that sounds fun.

But how do you use lazy stippling for watercolor texture in artwork?
Layering for Watercolor Texture
Use a lighter layer and a darker layer together to create depth. Let the first layer dry before painting the second layer on top of it.


This is a great way to make blooming trees or even regular trees. Just add a trunk or a few branches. Try a blooming tree with this older tutorial for a weeping cherry tree card.

As a Watercolor Background
Lazy stippling makes a great watercolor background for lettering or drawing too.
Try it for a Thank you card or behind a drawing. If you want ideas for Thank you lettering, I have some printable Thank you lettering idea worksheets to help.


Watch Lazy Stippling in Action
What are some other ways you would use lazy stippling? Share them in the comments below.
I hope you leave with some watercolor texture ideas of your own to try.
And remember to enjoy the process.

Joanne Groff
Just a brainy creative with a fascination about how people think and understand. I use watercolor and letter design to encourage connection ... with self, the environment, and especially the people who live there.

