How to Draw Pumpkin Sketches with Fall Words
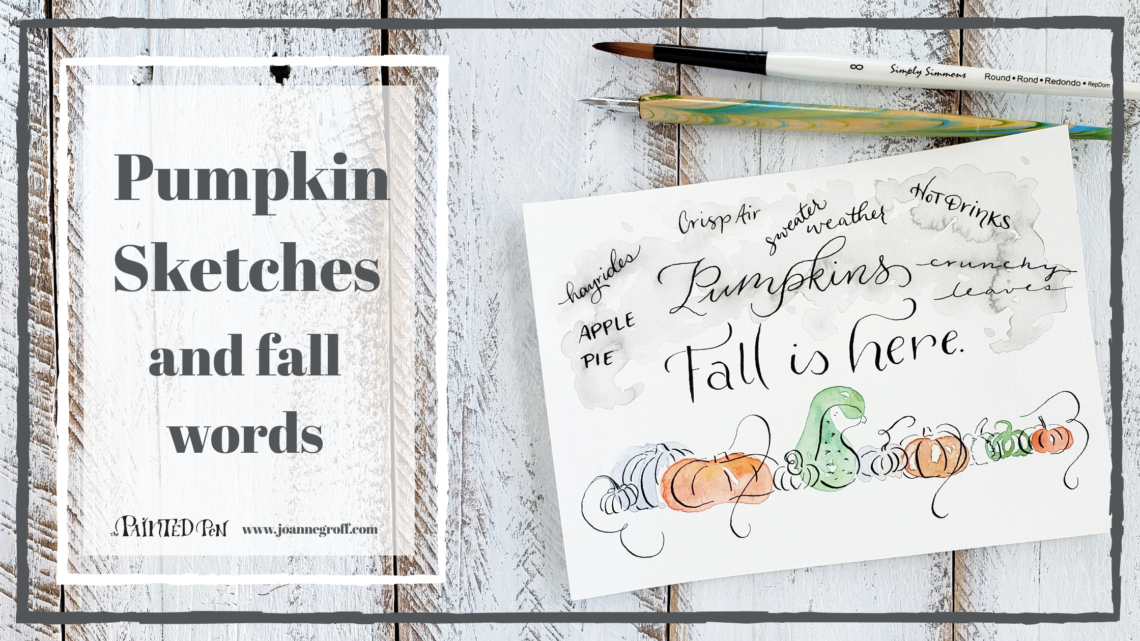
Pumpkin sketches and fall words are the perfect way to express the fall feels of the autumn season.
“And all at once, summer collapsed into fall.” ~Oscar Wilde
As if overnight, fall is here. It amazes me each year that as the nights turn cold and the days become blustery, the craving for fall deliciousness comes wafting along with it. Apples. Soup. Chai (and coffee, but there is always coffee). Pumpkins … oh, the pumpkin yummies!
Not just food though, fall makes me want to pull out my sweaters, walk through the crunchy leaves (and stomp them), hold onto a hot mug, and pack into a wagon for a hayride through the countryside.
What’s not to love about this time of year?! So … let’s capture some of these fall feels in our tutorial.
We’ll start with some pumpkin sketches and watercolor backgrounds. Then, we’ll add our favorite fall words. Feel free to add your own favorite words. What do you love about fall?
Here’s the video. Then, keep reading for the written version (it has extra hints and tips).
What you need:

- Basic calligraphy supplies with Sumi ink and Ziller Soot Black Ink
- Basic Watercolor supplies
- Winsor & Newton Cotman Sketcher’s Pocket Box, for orange and green pumpkin colors
- Gray paint, I love payne’s grey by Winsor & Newton
- Inkfurie’s LetterInk guide
Pumpkin Watercolor
Take a moment to think about pumpkins. I always start by thinking about shapes and colors. The exercise helps me get the image into my mind.
Pumpkins come in all different shapes and sizes. Feel free to go look at a roadside stand where there are lots of pumpkins or search for pictures of different pumpkins and gourds to get a feel for the differences.
When you’re ready, paint a variety of shapes with a variety of colors. I painted a swan gourd, a cinderella pumpkin, a pie pumpkin, a couple of small gourds, a large gray jarrahdale pumpkin, and a smaller gray pumpkin.

A swan gourd is shaped like a swan. And doesn’t a cinderella pumpkin make you want to hop in and ride to the ball? 
I love gray jarrahdale pumpkins … or are they squash? They are beautiful and delicious.
Leave space between some pumpkins and paint some that are touching. It’s fine if the watercolors bleed into each other a little bit.
Let them dry completely.
Pumpkin Sketches

Use the pumpkin drawing ideas from this picture to create some pumpkin sketches over top of the watercolor pumpkin layer. Use a pencil for this part so you can erase if you need to.
You can line up the edges of the pumpkin watercolor with your drawing layer, but I like to mismatch the pumpkins and drawing edges to give them a loose feel. Overlap the pumpkins where you can, so some are in front and some are behind.

Fall words
Now, let’s add “Fall is here” and some other fall words.
Sometimes a straight edge comes in handy. The Letterink guide by Inkfurie is a wonderful tool for small projects like envelopes and quotes. I used it here to make sure “Fall is here” was straight.

I can keep my lettering straight and sized well with the LetterInk guide by Inkfurie. 
More straight lettering.
I do not receive a commission on this, I just like the guide and Inkfurie’s beautiful flourished Copperplate calligraphy. However, for the month of October, if you are a Blots & Jots email subscriber, you will receive a code for 10% off your own LetterInk guide.
Thank you for your generosity, Inkfurie!!
After you have your lines drawn, sketch “Fall is here” in pencil centered above the pumpkin sketches.
Use the LetterInk guide to randomly place lines in the sky above the pumpkins for other fall words that you love.
Here are some examples: apple pie, pumpkins, sweater weather, hot drinks, crunchy leaves, cider, cozy, falling leaves, blustery breeze, and more.
Scatter fall words over the top of the page. Vary the size and the lettering style for each word.
When your sketches are the way you want them, go over everything in ink. Use sumi ink for the fall words above “Fall is here” and Ziller ink for “Fall is here” and the pumpkin sketches.

Write the fall words with sumi ink and a calligraphy pen. 
Draw the pumpkin sketches with Ziller ink.
Finishing touches
I wanted my pumpkin sketches to sit under a stormy gray sky. This is when it’s important to know your inks. Ziller ink dries to waterproof quickly but sumi ink takes a long time to dry completely. It’s not dry enough when it’s dry to the touch. We’ll take advantage of that now.
(Learn more about how some inks react with water over time as you read Ink and Watercolor testing ink with water on a dragonfly drawing.)
Fill a brush with plain water. Paint over the sumi ink and fall words to form clouds. As you do, the ink will start to release some of the pigment into the water. Brush and move it around until the sky has a stormy feel.

Let it dry completely.

And you’re finished! How will you use your pumpkin sketches with fall words?
I hope you’ve enjoyed this week’s tutorial and that it brought a smile to your face.
Keep creating! It’s like laughter … good medicine.

If you like pumpkin tutorials, you might also be interested in Pumpkin Drawing with a Flourish.

